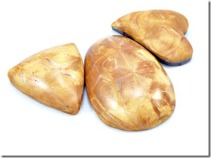
When I first started making jewelry with clay, I made all sorts of round beads. I used canes, translucent clay, mokume gane veneers and everything else and rolled lots and lots of beads. Looking back, I think it was just a subconscious association I had with jewelry = beads = round. It wasn’t until I started looking around a bit more that I noticed jewelry could be made out of anything! Round beads, cabochons, organic shapes, flat pieces, domed pieces… you get the drift.
I went through phases with each shape. First was the round bead. Cindy Leitz’s tips on rolling perfectly round beads really helped. I follow the exact method she shows in this video, except I like to use gloves for that final smoothing roll. This works nicely for graduated bead sizes. I can manage hand rolling only with a medium or large sized bead though. For tiny spacer type beads, I have lots of bead rollers! I like this round bead roller. It can make beads of 5 different sizes and has a channel for piercing.
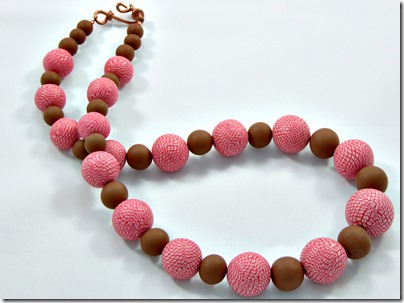
I also went through a phase with hollow beads after this tutorial. I love the gentle curve of these beads and how light and airy they are. I have the Sculpey Hollow bead maker as well as a couple of metal palettes. The hollow bead maker is great for graduated sized; the medium large one is my favorite for a pendant. The palette is good when I want to make a bunch of beads the same size, like for earrings for instance. I like the domed shape for mokume gane veneers because there’s more surface area to show off a good amount of the pattern that’d be lost on a round bead.
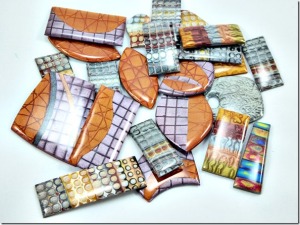
I also discovered flat pieces somewhere along the way along with cookie cutters and templates. Oh the possibilities!! These are also great for mokume gane pieces and anything else that will be finished with a layer of resin. Lynda Moseley makes lovely flat shapes with gently curved edges that show off her veneers. I’ve found that it does work very well for her faux techniques and marbled veneers. I like the cutters from Poly-Tools, they’re quite organic and different.
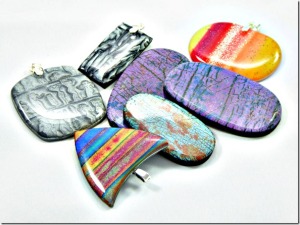
Recently, I started getting obsessed with puffier cabochon like shapes for simple chunky pendants or earrings. I looked into Melanie Muir style dimensional pieces which are beautiful but weren’t puffy enough for me (I do have my eye on her CraftCast class though, it looks like fun!). I had played with CaBezels as well but it wasn’t quite what I was picturing in my head. I wanted something that was generously domed, preferably hollow. I toyed with making rough cores with Ultralight, but I wanted to be able to make the same shape again if I wanted.
While searching for a good technique, I came across Dan Cormier’s Relief Beyond Belief (RBB) eBook. Now these beads seemed to be exactly what I wanted. But I wasn’t sure if it worked only with his templates and I wasn’t sure how easy it was to do. The combination of the book and a couple of template sets wasn’t a cheap one; I wanted to know more before I took the leap.
I had a chance to pick Diane Bruce‘s brain during Carol Simmons’ workshop and she mentioned she had taken a workshop with Dan. She also showed me some of the Cutting Edge templates she had and told me the RBB technique was pretty adaptable. That was all the encouragement I needed!! I ordered the eBook and a sample set of dies as soon as I was home.
I think this has to be my favorite clay book! The fact that it’s in electronic format allows nice links and indexing which makes it easy to revisit specific sections. But more than that, I love the precision of the instructions. I’ve never been “a pinch of this and a dash of that” kind of person and I love how there are very precise explanations for each step with a clear picture illustrating the point. The process is quite simple, but there are many potential mistakes, all of which Dan makes sure to mention and warn against. He also has some great tips for sanding and finishing, some of which were quite a revelation for me.
I’d planned to read through the book a couple of times while I waited for my dies to come and try it out with some scrap clay. But then I found a Natasha bead that I’d shaped and packed away that had gone all wonky. Rolling it through my pasta machine produced a nice swirly design. I saw a CoolTools template lying nearby and thought, why not try it? I did the first couple of steps from memory without paying very much attention. When I got to the actual forming step, I sat up a little, mindful of Dan’s warnings, but still without much hope. To my amazement, the clay shaped up, exactly the way he explained! At this point, I sheepishly went back to the book and reread the instructions to finish up properly. Pretty soon, I had my first bead!
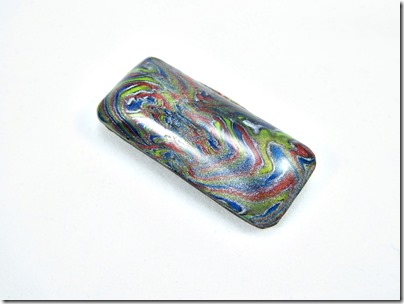
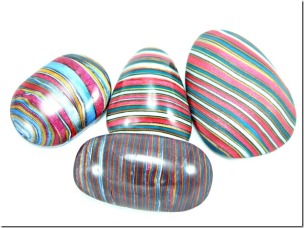
I did some experimenting with dies and cookie cutters, and love the results! Trying the technique with cookie cutters is a little fiddly. My first experiment came out well, but the second bead collapsed a bit. I’m not too fussed since these were made from scraps (does anyone else ever run out of scrap?! With the multitude of ways you can use leftover clay from a project, how does one save scrap to use as cores and things?! More on this topic later). I also messed up a little with the longer bead: I kept changing my mind on which cookie cutter to use and that left some marks on my sheet. The striped veneer is so thin, I didn’t want to sand it away. But the bead is still nice I think.
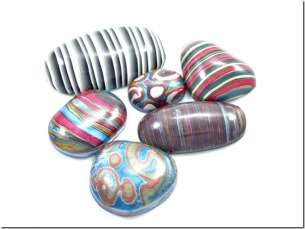
The mica stripes come from trimmings off a Carol Simmons mokume gane stack. Isn’t it yummy?! My mom always says the pieces I make out of scrap are the best; in this case I’m kind of inclined to agree.
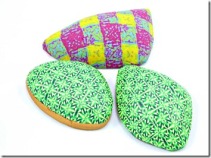
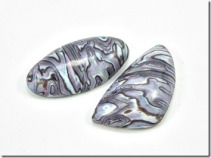
I’ve been scouring all online store for more templates I can use with this technique, and also looking into ways to make my own templates! I still haven’t found a perfect solution, but I’m going to keep trying. In the meantime I did make some nice shapes with the Cutting Edge dies and some templates from Melanie Muir. I pulled out some old canes and things that I had on hand and covered my RBB blank beads. The green and yellow ones turned out especially great I think. The pattern is from Meg Newberg’s gemstone cane. I also added some 3D mica shift and faux abalone. Everything looks better on a nice puffy bead!!
Hollow Relief Beyond Belief beads make using cookie cutters and assorted templates.
Now I had all this made and the blog post written up to this point and was planning to publish the post last week. But then, I got my peeler kit and holes and lines tutorial in the mail, and I just HAD to include some RBB style beads I made with those veneers. So I spent all of last week mixing some new mica shades and experimenting with some slabs. Now I used my Lucy slicer to take slices off my slab. But I’ve been using the peeler for stamped mica shift and it’s so much better than using a blade. I might cover more details in a separate post on mica clay experiments, still trying to get some samples and information together.
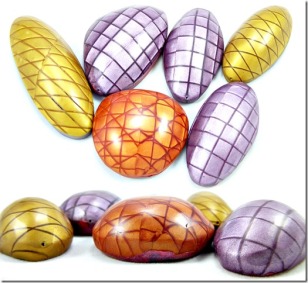
I’ve included a sideways shot of a set of beads to try and illustrate how puffy they are. But so light for the size! One thing on my list to do is make a solid bead and hollow bead using the same form and weigh them to find the actual difference in the weight. Also, you can see some cuts on the surface in the large gold oval bead. Now with almost all the others, I made a core with scrap clay and layered a super thin veneer over the baked form. This took longer with the multiple stages, but gave me much more control over the final piece. There were some cases where I didn’t join the seams of the veneer on top and back neatly (see the orange bead in left photo). Now all this could have been avoided with some care and patience. But I was in such a hurry to get all this done this week, I didn’t pay much attention to all that. Of course it bothered me like crazy when I was taking these pictures, but I wanted to include it as a reminder what NOT to do!
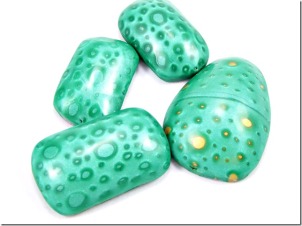
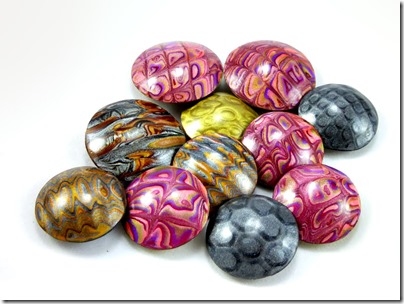
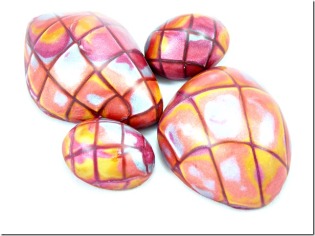
The remaining pieces from the experiments were combined together into a hasty mokume gane stack to cover some more blank beads. And it turned out nothing like I expected. But I love them! The colors seem to reflect the colors of the leaves right now. And fall is my very favorite season! I wish I knew how to replicate these colors to make a fall themed leaf necklace of some sort. There’s something so satisfying in using new and different colors. It really sets each batch of jewelry apart.
So that’s my bead shapes post! Hope you enjoyed looking through it. Tune in next week for ideas on how to use scraps from such projects!
