Shiny, shiny beads

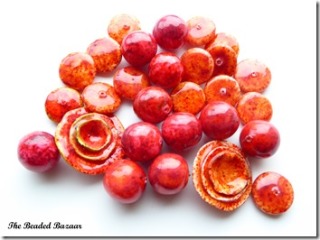
I’ve been obsessing over shiny beads lately, based on Debbie Crothers’ embellished beads tutorial. I also got her liquid clay tutorial, which has so many tips on how to use Kato liquid clay to produce a fabulously shiny bead. I’ve been experimenting on different things mixed into the liquid clay as well. Some have worked well, some, not so much!

Blue polymer clay beads: The Beaded BazaarRed polymer clay beads: The Beaded Bazaar

Red and blue beads

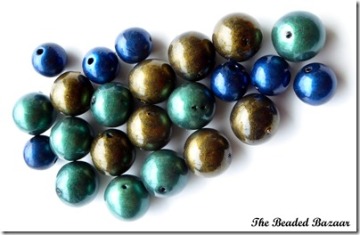
I tried to stick to some color schemes with the vague idea of stringing them together to make necklaces. There’s a red lot and blue, what I started with. I also tried some simple black and gold beads. Lastly, my favorite, peacock colors in burnished gold, blue and green! I’m trying to think of a good focal for the peacock colors, I think the beads have the potential for a lovely statement necklace. I might also add some purple beads.

Black and gold polymer clay beads: The Beaded BazaarPeacock color polymer clay beads: The Beaded Bazaar

Black and gold beads (L); Peacock beads (R)

I love the look of these black and gold beads as well! The black ones were supposed to be just for practice, but I love their simple look. I think I might make them into a simple necklace. The giant burnished gold ones are hollow! I think those would be great with some ribbon maybe? I’m not sure how to string these up.

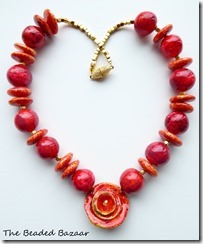
I managed to string the red beads together to create a nice chunky necklace. Large Ultralight clay beads make sure it’s not too heavy. I really do like this one! It’s a touch too big for me, but I’m still tempted to keep it.

Red beads necklace: The Beaded Bazaar

Red rose necklace

For a touch of cuteness, here are some holiday themed miniatures I’ve been working on. I plan to put these on my monitors at work! I know I have a wee Christmas tree somewhere as well, which I’ll have to dig out!

Winter miniatures: The Beaded Bazaar

Winter miniatures

Fall is here!

It probably feels like I’ve fallen off the face of the Earth after I said I was off for a week long clay workshop. I kinda feel that way too. Life happened, adulting got in the way and this blog and clay in general really had to take a back seat for a while. But fear not, I still managed a few things here n there.

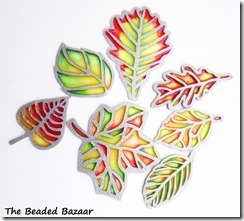
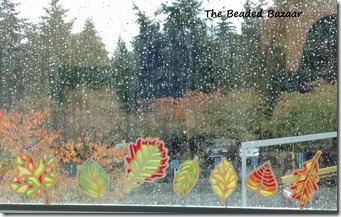
I made a few leaf suncatchers, similar to the butterflies. These are gracing my window at work. They seemed really big and many on my work surface at home but look lost on my window!! I think I need to add some more leaves, and maybe some larger ones.

Leaf window clings Window clings

Polymer clay suncatcher leaves

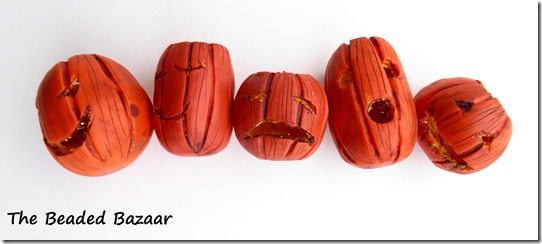
I also found time to make some wee carved pumpkins to sit on my monitors. They are perched precariously secured by a bit of poster tack. I’d planned to make a whole bunch of these, inspired by Jennifer Sorensen  from Wishing Well Workshop, but only got around to these five.

Mini carved pumpkins

Polymer clay mini carved pumpkins

I’m glad I made at least this though. I feel like I need to have more clay related things surrounding me at work, since I spend so much time there. I’ve been meaning to make a pen holder forever (my pens are stored in a paper cup right now. Sad, I know). I bought the galaxy tutorial from KatersAcres recently and I think that will make a nice pen stand. Hopefully I’ll have a little time to try it out soon.

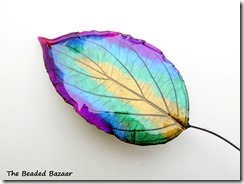
Mica leaf

Polymer clay mica leaf

Let me leave you with this mica colored leaf I made. Again, I’d planned to make a bunch of these and stick them in a vase, but the interesting leaves I brought home kept drying up before I got around to them!

Tube beads and faux ceramic

I don’t have much to share here. Most of my time recently has been split between challenges at work and working on finishing up a Japanese themed swap that I was supposed to send out last month! But I’ve been in touch with my swap partner and we’re both travelling this month. So we decided to mail our pieces in a week or so. She suggested doing a “sync-ship” so we’ll both get our packages around the same time. And of course the minute the deadline moved, I pushed away the pieces I’d been working on energetically and went off on a clay tangent!

Even with all that, I have finally finished a few different things. I still need to do some finishing, but that shouldn’t take too long (I hope!). It’s funny, at first I had no idea what to make for the challenge. And then slowly I found about four different tutorials for Japanese related things that I already had and ideas started flowing. I didn’t have enough time to implement my original idea, which was to make a tiny Japanese garden or Zen garden. But I still have that at the back of my mind and will be making one when I have a moment. I think a wee Zen garden will be great on my table at office.

There are a few other techniques I tried as well. I bought the Cosmic Ceramic tutorial set from Iris Mishly a while back and have been playing with it on and off whenever I find a scrap of white clay that I’m too bored to reshelve. I haven’t nailed down the realistic finish yet (have you seen these gorgeous pieces from Christi Uliczny?! I think this one is my favorite). But I’m having a total ball with these. I’m finally putting all the PanPastels I have to good use, as well as various assorted stamps. I’m in the process of organizing some of my craft supplies and I keep uncovering stamps I forgot I owned!

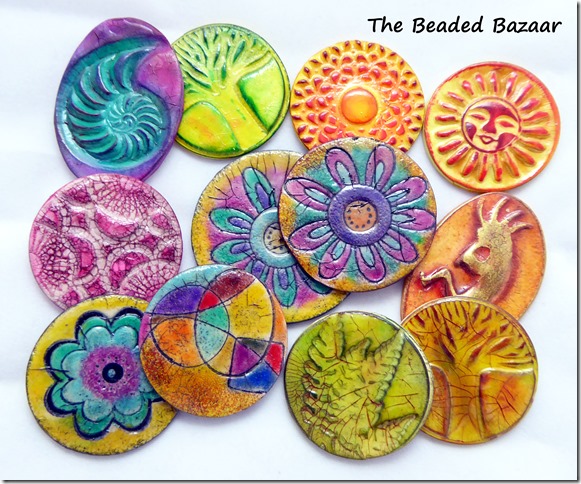
Faux ceramic beads

Polymer clay faux ceramic pieces

Another artist I’ve been following a lot lately is Ludmila Bakulina. She has a wonderful YouTube channel with lots of tutorials and tips. The one that got my juices flowing was a video she did recently using texture sheets and stamps with clay. What piqued my interest was that she showed a bunch of CoolTools textures that I’ve had trouble with, because they have a very fine texture. And boy does her technique work like a charm!! Here are a set of hollow tube beads I made with various small texture sheets. Also, a earring pair sitting on top of the fine line texture sheet I used for them. Even with the crazy close-up, you can barely see the texture. I have NEVER gotten a clean impression with this one by just pressing the stamp into clay. But rolling the clay onto the stamp created a wonderful raised pattern, nicely highlighted with Gilders paste.

Hollow textured tube beads Fine texture earrings

Textured tube beads and textured earring pair

In other exciting news, I’m finally off to Carol Simmons’s master cane workshop this week! My bags are packed, my supplies are in and I’m all ready to learn buckets of things! I spent some time making a few color keys in preparation for this workshop which was quite insightful. I never realized the lovely shades of green between Cobalt Blue and Zinc Yellow. I will be making many more of these scales once I get back and start trying to mix more custom colors of my own.

Polymer Clay Color Keys

Polymer clay color keys

Bettina Welker Workshop in Victoria

I had a great time couple of weekends ago learning all sorts of cool things at Bettina Welker‘s Texture, Form and Color workshop. Bettina is a great teacher and a super fun person to be around! I made a whole bunch of beads and learnt some neat tricks with Genesis Heat Set paints. Barb and Irene, who organized the workshop, had arranged for a set of samples in the primary colors for all of us, so I came back with a good amount of paints and other bits of things I can use.

The flow of this workshop was a bit different than I expected. Bettina demoed a whole bunch of techniques and sent us off to try them out in any way we liked. This was more of a “technique” workshop and gave us a lot of freedom on the beads we wanted to make. I liked this approach, because it let us set our own pace to a certain extent and everyone came up with markedly different results. Bettina also worked along with us (though she had to be a step ahead so that she could show us each stage) and took a few minutes occasionally to walk around and offer encouragement and suggestions.

I didn’t finish up my necklace in time, because I had a ferry to catch. But here are some of the beads I made in some configurations I’m playing with. I’m pretty chuffed with them. They’re much larger than the beads I usually make. But I love that Bettina’s bold graphic style shows its traces here. Bettina gave us some good tips on assembling the necklace, which is something that I always struggle with. I’m still not sure this is the “final” layout for either of the necklaces but it’s a start!

Sampler necklace 2Sampler necklace 1

Sampler necklace layouts

I meet a bunch of clayers during the workshop, some new friends and some old. I was thrilled to meet Carolyn Good of 2GoodClaymates and put a face with the name (checkout her summary of the workshop, you can see me hovering behind Bettina in the picture!). She made some really lovely beads AND I got to see a lot of her snap jewelry in person! It was great fun to talk clay over lunch and dinner and discuss all our experiences with clay. I’ve resolved to try and make it to one of my guild meetings but we’ll see how that goes (they meet on weekdays and it’s pretty far away)!

Things at work are heating up again so I apologize for sparse posts. This post itself has been so delayed! I actually have a pile of beads I need to drill and finish up, see the shot of them below piled into bowls. I’ll try to do some quick posts on them as frequently as possible. Also, my master cane workshop with Carol is getting closer and closer! I’m sure I’ll have lots to talk about after that! So make sure to check in!

Beads To Be Finished

Beads waiting to be finished

Beads, butterflies and silkscreens

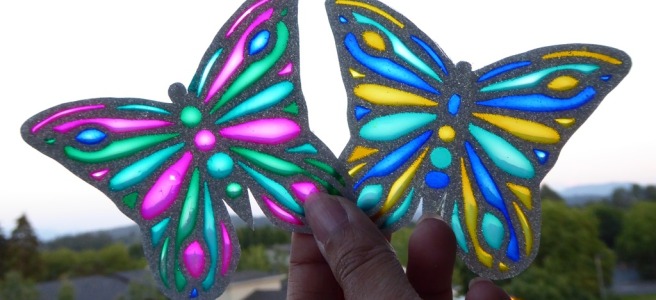
Today I have some suncatcher butterflies to show off. I made these following Donna Kato’s really cool CraftArtEdu class. These are especially close to my heart because I made them for my mom. See, a while ago when my mom was visiting me, we both bought these really pretty butterfly magnets. Now my dad travels a fair bit and usually gets magnets from all the places he visits. So their fridge is covered with a bunch of cheery magnets (including, of course, the especially awesome ones I made!). A month or so back, my parents had a young visitor who really liked many of the magnets including the butterfly one, so my mom popped them off and gave them to her to take.

Now my mom isn’t nuts about magnets like me, in fact I usually end up buying a pair of whatever catches my eye and cajoling her into taking them back. But apparently she really liked the butterfly in particular and she mentioned that one a couple of times rather wistfully. Now for the life of me I couldn’t remember where we’d bought them. I told her she could take the one I had the next time she visited. But I couldn’t help thinking: could I make that in clay?!

Polymer clay window clings

Polymer clay window clings

Hence, these silver butterflies! They’re not as thin and delicate as the magnet we bought, but my mom’s eyes lit up when I showed them to her, so I consider my mission accomplished! I used Premo silver glitter clay for the outline and really like the bling they added. I plan to make a whole bunch of these and tack them on to my office window. That way they’ll be seen from the outside as well! I made a few smaller butterflies as well. Here’s a blurry picture of how the whole lot of them on my porch window. I’ll try to take a better picture later!

Polymer clay window clings

Polymer clay window clings on porch window

Apart working on these, I finally got around to trying out an idea I had batting around in my head for a while. Silkscreened round beads! I made some hollow round beads following Orly Fusions interesting technique. While the idea is really innovative, it isn’t the easiest in the world. On my tenth try I managed to make reasonably round beads which I used here, but you can see that they’re not really spherical. But I like that the beads really use nothing but clay so I don’t have to hunt down sugar balls or try to compress silver foil or anything. I think I’ll use these as accent beads in a simple necklace with a chunky focal and some thick cord.

Polymer clay silkscreened beads

Polymer clay silkscreened beads

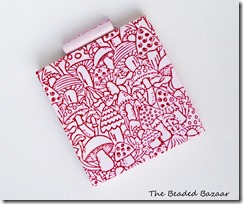
Speaking of silkscreens, here’s another compact style mirror with a clay hinge. This wasn’t planned at all. I got a nice new bunch of silkscreens from Tonja and was super excited about a mushroom patterned one in the lot. So I pulled out some red paint and swiped it over a bit of white clay with the vague intention of making a couple of earrings or maybe a pendant. But once the pattern was on there I couldn’t bear to cut up the adorable mushrooms! So I left the sheet on the tile while I tried to think of something I could make with it. I was debating simply laying it on a tiny canvas when I saw a square mirror sitting in the corner of my work surface. And wouldn’t you know it, the sheet of clay was the perfect size to cover it! And since I was in a silkscreen frame of mind, I added patterns other side of the lid, the mirror frame and the back!

Polymer clay silkscreened mirror frontPolymer clay silkscreened mirrorPolymer clay silkscreened mirror back

Polymer clay silkscreened mirror

In other clay related news, I’m getting super excited about two polymer clay workshops I’ll be attending soon! That’s right, TWO workshops! The first one is with Bettina Welker in Victoria. She’ll be demonstrating how to create her sampler necklace. I love Bettina’s work; I have a bunch of her classes at CraftArtEdu. I’ll be meeting some of the folks from Carol Simmons’ workshop last year, so it’ll be great to see some familiar faces.

In September I’ll be off for a whole week to learn all about master canes from Carol again. I can’t even begin to describe how excited I am! First of all, spending a whole week claying sounds like a dream come true. I have been drooling over the master canes Carol and her students create for so long, and now I get to learn how to do that! September cannot come quickly enough! I already have a long list of things I plan to make with my master cane!

So if you don’t see some activity here for a while, don’t give on me! I’ll be back! In the middle of all this mayhem, I also signed up for a Japanese themed swap! I have a couple of ideas brewing in my head and of course they involve new consuming techniques! Stay tuned for updates on all of this and more!

Peacock pendants

I didn’t get a whole lotta claying done this past couple of week. I wouldn’t say I’ve lost my inspiration…but maybe I’ve lost my clay mojo? I usually have a billion ideas swirling in my head and a million projects ongoing. And of course there’ll be tutorials that I HAVE to buy right away and try out right away. There’ve been so many times when I’ve woken up, turned on my TV, sat at my clay spot just start making things! And before I knew it, I’d’ve blitzed through entire seasons and forgotten about lunch. But lately I haven’t had the drive for such claying marathons.

Not that that’s a bad thing necessarily. I suppose choosing to vacuum over building a cane is a sign of growing up! Also, the weather has been getting steadily hotter here in the Pacific Northwest. For someone who essentially grew up in a ridiculously hot place, I really despise summers. I tend to just flop on my couch with two fans pointing at me and not move for long periods of time! But it’s almost August, so fall (my favorite season!) will be here before I know it!

Now all this isn’t to say I didn’t make anything. I can’t stay away from my clay table for very long even if I don’t have the mood or energy for marathons. I made a couple of peacock pendants following Chris Kopano’s PCA tutorial. It was great fun! She recommends using foil backed glass cabochons for these, but I didn’t have any on hand. So I tried a couple of different things. I used a large glass pebble for one and a mini Cabezel filled with Pebeo Prisme paint for another. For the third, I simply poked a ball tool in the middle and filled that with Prisme paints. I wanted to add resin on the Pebeo paints to simulate a cabochon, which works quite well for the Cabezel, but didn’t dome nicely for the other one. So I had to cover the whole piece with resin.

P1020732

While I do love these, I still feel like there’s something better I could use for the center cab. I could do away with it completely of course, but I really love the way it draws the eye and makes the whole piece seem richer somehow. I spent a good amount of time searching for foil backed cabs but didn’t find any I liked. Patricia Roberts-Thompson posted a piece she made with a rivoli crystal in the center and that looked lovely. So I’ve ordered some of those.

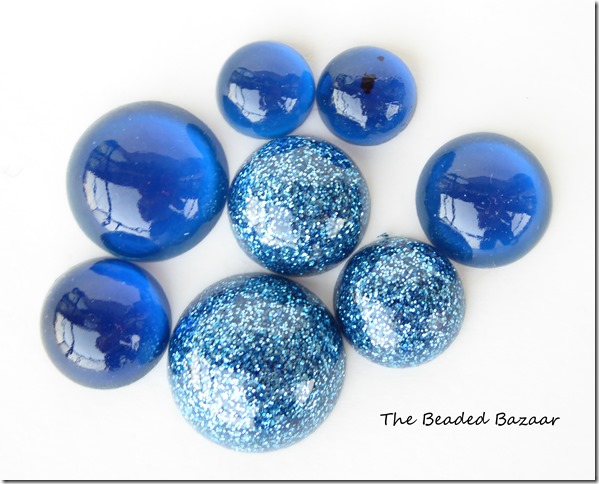
I was mulling over ideas on how to create my own cabs with translucent clay when an idea struck me, why not try casting some resin cabs? So I went off and mixed some resin and added some blue alcohol ink to it. I quite like these set of cabochons. They’re the right size and while casting is a fairly time consuming process, I can make as many as I like in any color I want. I also experimented with adding some glitter for a brighter effect, which was kinda cool as well.

P1020741

I tried these out in the oven and while the cab itself retained its shape, the lovely blue disappeared and color turned kind of yellow. I’ve heard of resin yellowing when baked but didn’t realize the ink coloring would basically vanish. I simply painted over the surface with some blue ink and protected the entire surface with some Pym ii. Well actually I thought I was spraying Pym ii but that turned out to be Triple Thick spray varnish! So far the surface hasn’t gotten tacky or anything, but it’s been barely 48 hours! So I’m keeping my fingers crossed.

P1020770

I haven’t been caning very much lately, which makes me sad. But I did manage a zig-zag cane from Deb Hart’s CraftArtEdu class. I have to say, it’s a lot more work than I anticipated! I decided to follow the instructions exactly, so I mixed up about 8 custom shades of clay, made several skinner blends and built a bunch of base canes. Then there was all the artful slicing and arranging. I used all Kato clay after a long time and it seemed that each color was at a markedly different consistency. So it wasn’t the most fun making it all come together. But the final cane are quite cool I think. I haven’t made a multicolor pattern like this in a long time. Here are some hollow beads with the chevron veneer.

P1020765

I have a couple of more things I’d like to talk about, but I want to break out of the cycle of super long posts once a month! So I’m going to leave it for next time!

Red, blue and white

Polymer clay flowers

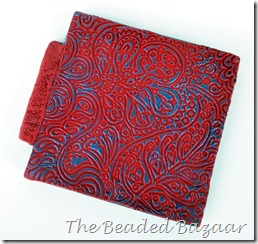
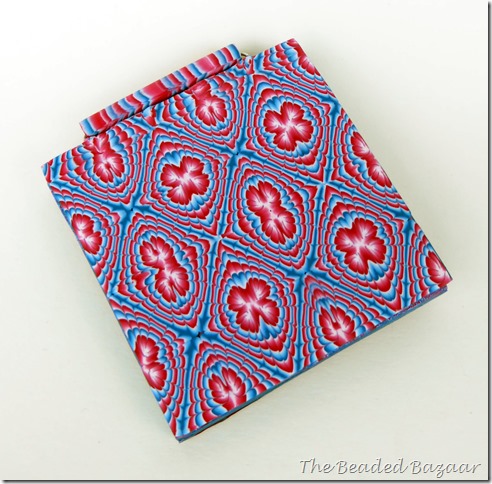
Last week I FINALLY got my red, blue and white themed swap in the mail. While I didn’t end up making anything I originally planned, I managed to get a couple of different things in the box. First off, some more shots of the mirror I framed. I also added a clay hinge to make it a compact mirror. I didn’t spend enough time on this so it’s not as perfect as I’d like. I cured the top and bottom separately but forgot to account for the hinge space in the base. And of course I realized that in the very last step when I wanted to attach the two pieces! I hastily threw some extra clay on top and forced it all together, but it isn’t the neatest job.

Polymer clay mirror front: The Beaded BazaarPolymer clay mirror frame: The Beaded Bazaar

Polymer clay mirron

Ideally, the pattern on front should be beautifully symmetric instead of the weird sort of pulsating pattern I have going. All the clay here is Sculpey Souffle, which caused the square canes to squish to rectangles while slicing. To compensate for that, I shaped the cane into a rectangles thinking it’d give me square slices. Just before I was about to slice it up, I read a tip from Teresa Pandora Selgado (who make GORGEOUS canes out of Souffle) on chilling the cane in the fridge before slicing. Sure enough when I tried it there was zero squishing. Which meant the rectangle cane I’d forgotten to reshape gave me rectangle slices!!

Polymer clay mirror hinge: The Beaded BazaarPolymer clay textured back: The Beaded Bazaar

Mirror inside and textured back

Despite all this, I’m happy with the results. These were all free form canes and were great fun to make. I’m very pleased with Souffle for these types of canes. The colors are lovely and the canes reduce with hardly any effort. I’ll be experimenting some more with this. I used very little red and blue clay to make a bunch of different canes, so most of it went into the mirror. I had a couple of scraps left that I turned into this pendant and earrings. I didn’t add this to the swap because I thought it looked too squishy though!

Polymer clay pendant and earrings: The Beaded Bazaar

Pendant and earrings from leftover cane slices

I got a new Cabezel mold that I have been loving! I really like the petal and drop shapes in this one. The shapes fit together to make large complex focal pieces. I cut out a bunch of bezels and made a pendant and two pairs of earrings. I filled them with some Pebeo Prisme paints and topped it off with resin. If I’d had more time I’d have like to put together a sari silk necklace for this, but I sent just the pendant and earrings.

CaBezel pendant and earrings: The Beaded Bazaar

CaBezel pendant and earrings

I also made a bunch of flowers in red, blue and white. Here are some tulips, a rose, daisy and calla lily. One of my original ideas was just a bouquet of these flowers but they turned out to be pretty complicated to make, so I just finished these few and sent them off. I do plan to make some and stick them in a vase on my office desk. But man, these flowers are hard to make!!

Polymer clay flowers: The Beaded Bazaar P1020677

Polymer clay flowers

Finally, I managed to throw in a hollow pendant based on Wendy Orlawski’s class in PCA. I stamped a sheet of clay with some blue and what I thought was red, but turned out to be orange for the inside, and did the outsides in red, blue and white. Really rubbing your face in the theme aren’t I?! I liked how this turned out, so I made a few similar ones and stuck cane slices inside them. I like being able to match the “frame” color and the colors from the canes. This type of bead makes a nice big focal. I’m thinking of making some long necklaces with just this bead or a couple of larger beads on ribbon or leather cord… I think it’d look good without being too much.

Polymer clay hollow bead: The Beaded BazaarPolymer clay hollow beads: The Beaded Bazaar

Hollow pendants

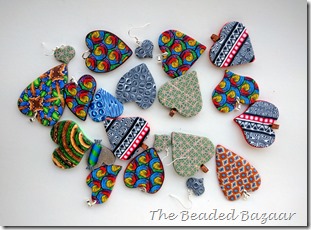
Once I was done with all this I kinda took a couple of days off from clay. Getting the swap done took quite a bit out of me and I needed some time to regroup and get inspired. I did spend some time finishing up some hearts I made for Hearts for Zach. Here’s a big bunch of them. I still need to add bails to a couple of them and I will be sending this lot off. I really hope people like them and buy them!

Hearts for Zach: The Beaded Bazaar

Many hearts for Zach

Couple of close up shots of the hearts are below. I sorted them loosely into categories. First up are CaBezel hearts with more Pebeo Prisme (I can’t get enough of the stuff!). The picture next to that shows what I consider surface effect hearts. That’s mostly textured and silkscreened pieces. I had great fun coloring some of the silkscreened hearts on glitter clay with some markers. I saw Syndee Holt post this idea on one of the Facebook groups I belong to and had to try it out. Also in the mix are some hearts using my own textures made using Helen Breil’s really excellent radiating textures tutorial. I’ve had this for the longest time but only tried it out now since I thought radiating textures would work nicely with the heart shape. I LOVE the mica powders on these! There’s a close up of just those hearts there, ‘cuz frankly those are my favorite!! I might keep a couple of them!

CaBezel hearts: The Beaded BazaarSurface effect hearts: The Beaded BazaarTextured hearts: The Beaded Bazaar

CaBezel hearts; Surface effects; Textured hearts

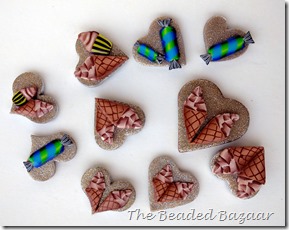
Final lots: cane work hearts and some magnets. I pulled a few canes out of my stash and made these. I quite like the black, white and red pattern: it’s composed entirely of extrusions. The magnets use some cane builder canes I made a while ago. I’d planned on making them into jewelry as well but magnets seem to fit better. Besides, it makes sense to stick ice cream cones on a heart doesn’t it?! To say you love ice cream?!

Hearts with cane slices: The Beaded BazaarHeart magnets: The Beaded Bazaar

Hearts with cane slices

Quick update and some canes

Phew, things have been rough at work. All I did over the last couple of weeks was literally go to work, come back late at night and fall into bed. Sadly that left very little time for claying (or anything really). So I don’t have any completed piece to show off. I’m trying to scrape together time to finish my red, blue and white themed swap. It was to be shipped in June!! I had so many ideas for this one: I really wanted to try an extruded star cane for this, and maybe some bargello. But I had no time for that. I have a couple of pieces almost done, will be sending it off on Monday. Want a sneak peak? Here’s a “compact” mirror with a free style cane veneer. I picked up a small square mirror and built a hinge and cover for it. More on this later, it’s a part of a swap so don’t want to give away too much.

Mirror covered with freestyle cane: The Beaded Bazaar

Mirror covered with freestyle cane

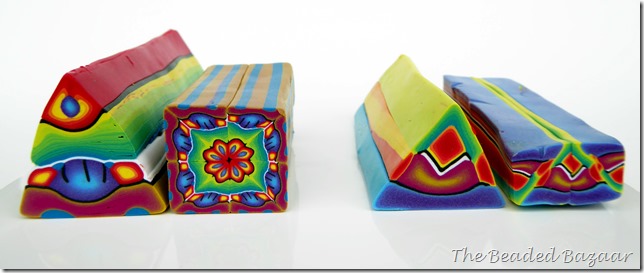
I did experiment with Teresa Salgado’s cane bender style cane using Souffle clay. I didn’t like the original triangle section much, but the assembled square looks good to me (the two canes on the left). I used the remaining blends I had for another cane in similar colors. I plan to cover another box with slices of all these different canes. Since they were constructed using the same set of colors I’m hoping they’ll be in harmony. My first instinct is to cover the whole thing with slices of the same cane. But that’s…boring! Since I’m not brave enough to try patching together completely different canes slices, using a set of similar ones seems to be a good start.

Freestyle canes using cane benders: The Beaded Bazaar

Freestyle canes using cane benders

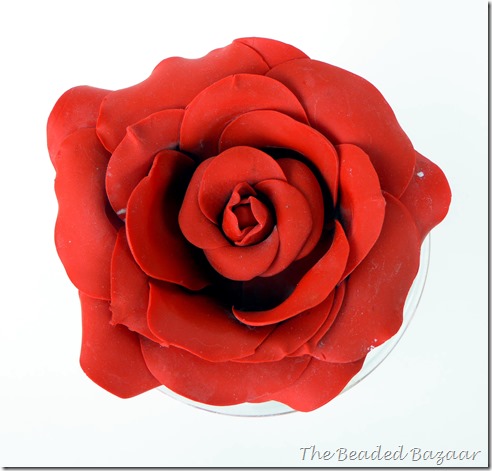
I got me a big bunch of fondant supplies and have been dying to try them out. These are mostly petal cutters for different flowers and a couple of border cutters. I’ve been very into clay flowers since I took the plunge and got Iris Mishly’s entire Flower Academy set. Here’s my first rose below in a random pot. While I wasn’t too happy with this to begin with, it does resemble a real rose. So that’s good! I’m playing with some variations of this and will hopefully improve my technique. It’s fairly time consuming since each petal has to be formed and shaped individually.

Polymer clay rose: The Beaded Bazaar

Polymer clay rose

Tune in next time, hopefully I’ll have more clay time soon!

P.S: I mentioned being into Grimm last time, but boy did that show turn soap opera-ish real soon. Without many other options (or time), I’ve started watching Supernatural. I’ve caught a couple of episodes before so I have an idea about the show. And with eleven seasons, that should keep me busy for a while!

Almost jade boxes and some feathers

I have been very bad with updating my blog. Again, I’ve gotten into the habit of wanting to talk about the million different projects I have going instead of picking just one. The problem with that is of course it’ll be a while before I’m completely done with all of them. And then there’s the fun of taking pictures, processing them and all that jazz (seriously, how does everyone do it?!). So although I have many irons in the fire, I’m going to talk about just a couple of things that I actually finished and I’m pretty chuffed with.

First off, here are some rough carved feathers (do they look like feathers?! I’m not sure!). With Donna Kato’s new carved pin class and some eye candy from Staci Louise Smith cropping up recently, I was inspired to pick up the carving gauges I bought forever ago and give the technique a try. While I wasn’t ready to try complex beads yet, I liked the idea of carving out simple lines in feathers or leaves. I formed some white clay into feather-like shapes, dusted it with PanPastels of various colors and baked them up. While still warm from the oven, I used my carving gauges to shave off some lines and reveal the white clay along the lines of the feathers. Once I was done with that, it seemed like the pieces still needed… something. So I pulled out my recently reconstituted Inka Gold and gently rubbed some all over the feathers with a light touch. While I’m pretty pleased with the overall look here, I plan to experiment with making the shapes more delicate and the carved pattern more intricate.

Polymer clay carved feathers

Polymer clay carved feathers

I should add a note here that I had literally zero luck with the cheap linoleum carvers I had. Even with warm clay, the linoleum carver seemed to stutter on the surface without making clean cuts. What did work was the one precious Dockyard engraving tool I bought a while back after reading this highly informative post on carving. At the moment I have just a small V gauge but I have my eye on the small U one as well. I’m trying to find a slightly cheaper alternative to the Dockyard brand. I also plan to try carving Premo Souffle and Ultralight, which I believe are easier to carve that regular Premo. Gah, so many ideas, so little time!!

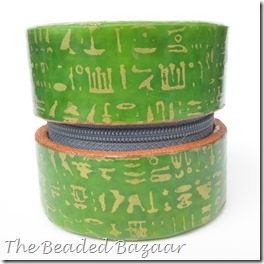
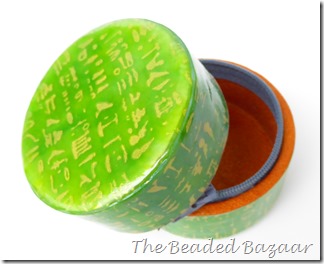
Among other experiments on my worktable recently, I also created a couple of faux-faux jade boxes. Why the double faux? The usual technique to create faux jade with clay involves mixing up various alcohol inks with translucent clay, stamping an image into it, antiquing with some paint and polishing it all up. While I wanted a jade-like effect, I was in absolutely no mood to go through all that. So instead, I cheated and used the opulent tapestry technique to create the jade color just on the surface of translucent clay. And instead of trying to stamp a clean image into a giant sheet, I simply silkscreened an Egyptian Hieroglyphs pattern using some gold paint. While this might not fool anyone into believing this is real jade, I really like the effect! And it was certainly much quicker than the more “traditional” faux jade route. I guess I should call this “close enough” jade!

Almost jade zippered box Almost jade zippered box

Almost jade box

The larger box above was finished using Iris Mishly’s brocade technique, while the smaller one was based off Donna Kato’s inro tutorial. I don’t have the right form for the inro yet, and rather than rushing to buy that immediately, I figured I’d give it a try with the form I have. Since I’d tried a jade look with the previous box, I experimented with some different shades of green. This looks more like jade to me and of course I don’t remember the colors I used!

P1020654P1020658

Almost jade inro box

My end goal is actually to create little nesting dolls using the inro technique. I got some pressed cotton shapes from Spunny’s in the shape of peg dolls. I think it’d be so cool to make nesting dolls dressed with cane slices and little polymer faces! At the moment, all this is just in my head, since I have no clue how to create a nice clay face or how best to adapt the inro technique to the funky shape. But the basic idea went fairly smoothly on the cylindrical shape, so I’m hopeful!

Also, here are a bunch of clay wands I made with real gemstones. The metallic one has a tiger eye stone at the tip: one of my favorite gemstones ever. Didn’t quite get the effect I wanted with that one. I think I need a lighter colored clay for more contrast. Though I used a bunch of different metal colored clay to decorate the wand, it seems to have washed out to a dull generic brown overall. The other two worked out pretty well though. I spent a good weekend making all the leaf and petal canes. The longest wand was the first one I made. I had no clue about the right length, until I went to bake it! I must’ve used a million cutters and things to prop it up nicely so the petals would retain their shape. I still managed to bend most of them. The smaller ones were easier to handle for sure.

Polymer clay wands

Polymer clay wands

Warning: random television related thoughts, not clay related up ahead, you have been warned!

I’ve mentioned this once before: I usually have my television running in the background while I clay (or do anything really). My seat at the end of my dining table where I have my work area set up has a good view of the TV, which is why I’m loath to make any changes to the furniture arrangement in my apartment. I usually binge watch a couple of shows at a time, just to keep things a little interesting. Sometimes when I pick up a completed bead or object, a picture or dialogue from the show I was watching when I made it will flash in my head. The cane or veneer somehow gets permanently wired to that show (or episode if it was specially memorable) in my memory. This has been happening more and more lately, even when I’m writing about something here. So I thought it’d be kinda fun to devote some text to the show that I’m currently watching.

I mostly like watching procedurals: I feel like they tend to be a little less intense that all out dramas or thrillers. That said, I watch a lot of TV! So I cover a fair variety of shows. My binge choice at the moment is Grimm. I won’t go over details, recaps or anything. That’s found easily enough, and this isn’t a blog on television after all (no, really!). I’m on season 4 at the moment and quite enjoying the combination of mysteries, fairy tales and good guys beating bad guys on a per episode basis. I’ve also started watching Mr.Robot: totally different genre but very compelling. I like to mix up a little comedy in the middle of more serious shows, but haven’t found anything very engaging there.

That’s it for the television portion of this blog post! Tune in next time to see more clay creations!

Bit of a rant and random updates

So for those who follow this blog, or at least check in occasionally, you might’ve noticed I haven’t updated it in a while. I have a list of excuses about a mile long: work, visitors, laziness, secret swap pieces etc. But honestly, I still had some pieces to share and talk about. The actual reason why I didn’t? I was feeling a bit “meh” about it all.

A part of it was the fairy door I finished in a great hurry just in time for the challenge deadline. No one’s fault but my own, I spent too long “designing” it rather than building it. It was a project close to my heart; I even wrote a whole post on how I created it. But once it was completely done, down to the last spray of PYM ii, something felt off. In theory, it matched my design. Inspired by this lovely peacock palace door, it had a “head” decorated with peacock cane slices, a stone cabochon to add some more color, decorative metal door with a blingy knocker and some matching walls. But once I’d taken the pictures and everything, I wasn’t completely satisfied.

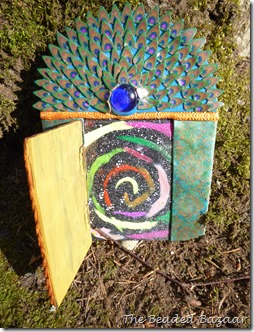
Fairy door Opened Fairy Door

Fairy door

The other thing that happened to put me off, just a bit, was some not-so-great swap experiences. I started participating in swaps last year, and for the most part, it’s been great! I’ve gotten some lovely pieces, people have been wonderful about what they received and I’ve learnt a fair bit. The clay community is very friendly, so I thought it’d always be that way. The first bad experience I had was with a charm swap at the beginning of the year. As usual I couldn’t decide on one thing, so I created a bunch of charms and sent them off last minute just before I left for a long trip. Now I created each of these pieces with a lot of care and tried to include a variety of sizes and colors so the recipient would find something she liked. Once I sent it off, I waited and waited to have an acknowledgement of SOME sort that she received it. Two weeks and nothing. At that point I sent a couple of private Facebook messages, spaced a few days apart asking if she received the package. Still no response. Finally, I tagged her in a post on the group asking if she received it. She finally responded saying she did and she was sorry but life was very busy so she hadn’t had time to upload pictures or make my swap. She promised to do both as soon as possible. It’s been three months, she never uploaded pictures and I haven’t received my swap.

Honestly, the part the hurts the most is that she never took a moment to say, hey, I got the package. It’s no small thing to make something, pack as carefully as possible, go to the post office and mail it out. I think the least someone can do is acknowledge all that by just saying they received the package. There’s just no way anyone is so busy that they can’t find a moment of time to do that. If they were, they shouldn’t be participating in swaps in the first place!

I think part of it is that is it’s a mutual swap and they haven’t sent out their pieces yet, they might be embarrassed about it. I know I felt that way at first, I wanted to be able to say “your package is on the way too” along with thank you. But then I realized I don’t really mind if the other person is late in getting their package in. It doesn’t matter even if they never get it to it. I just really want to know if they received their package and okay yes, I’d love to know if they liked it. Isn’t that the point of a swap? To send your work into the big black hole that is the universe and pray that it reaches someone who appreciates it? Maybe my work isn’t the prettiest or the most professional looking. I’m the first to acknowledge that I have a lot to learn.

But I take a lot of effort to send neatly finished pieces that I would love to receive. I try to find out something about the recipient so I can send something they’d like. I search through all the clay groups I belong to and try and find pictures they’ve posted or things they’ve commented on. If it’s a mutual swap, I reach out and ask about their preferences. I make many test pieces, spend as much time as possible finishing them neatly. Almost always, I send a few extra pieces with different sizes and different techniques, so there’ll be something that suits the receiver. I include a little note with all my packages explaining the motive behind the pieces and apologize for any imperfections I may have noticed at the last minute. No matter what I have going on in my life, I make sure I get the package out as soon as possible and double check tracking numbers, if any, to ensure that it has been delivered.

I think the main thing all swappers should keep in mind is COMMUNICATION!! Everyone has a very busy life with many, many obligations. I understand that. Maybe you were gloriously free when you signed up for the swap, but something happened and that changed. Maybe you’re busily working on the swap piece but it’s taking longer than you anticipated. Whatever the case is, do let your swap partner know. I’m sure they’ll understand and be sympathetic. And no matter what’s happening with your end of the swap, absolutely let them know when you receive their package. The minute you open their package you have an obligation to let them know you got it. Sometimes I’ll put off taking pictures and posting them because I’m too lazy to pull out my light tent: I’m trying to get better at this. But I will get on my computer and send off a message saying I received it. I know not everyone checks their mail every day. That’s okay as well. But the minute you do get the package in your hands and open it, do let the other person know!

Okay, that’s my rant! I swear, I wasn’t planning to go off the deep end about it so much. But this has happened a couple of times since. I haven’t received my swap and I have no idea if the other person received my package (though USPS says she did). With all this, I think I’m ready to take a break from swapping. I have one found-object swap that I signed up for a couple of months back: I’m working on that. But I don’t think I’ll be signing up for anything else for a while after that.

I also want to acknowledge some good experiences I’ve had! Esther Schmidt received her butterfly pieces from me and sent me an additional heart set after that! Amy Hucks sent this wonderful lion fish tin that must’ve taken forever to put together! And here’s a wonderful owl from Angela Thompson, who was also kind enough to share how she made it.

Lion Fish TinOwl

Swaps I’ve received

Ahem, on a more positive note, here are a few random pieces I managed to make over the last couple of weeks when I wasn’t obsessing over swap etiquette. I finally tried the faux opal technique from Donna Kato and was very pleased with the results. Here are a couple of pieces in a faux bone bezel from Tina Holden’s tutorial. Also some Holo pendants with glitter clay. I’m loving that Lumiere paint crackle on the glitter clay, I’ll be experimenting some more with that.
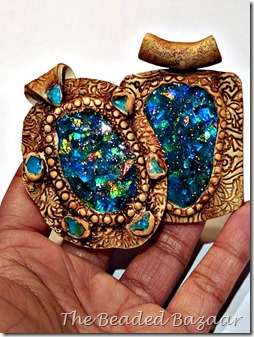
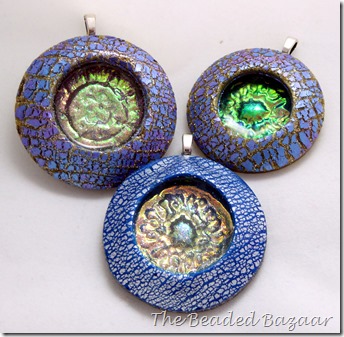
Faux opal with bone bezels Holo Pendants

Faux opal pendants and Holo pendants

I made some Ikat leaves using Lindly Hunani’s wonderful technique. Of course the minutes I used up half the cane for these, I decided to use an Ikat veneer for a zippered box. So I made another cane, this time using Kato. I like the brighter Kato primaries, I think I might soon switch over to using primarily Kato clay, especially for canes.

Ikat leaves 

Ikat leaves

The box was made following Iris Mishly’s brocade tutorial. I have another square box blank waiting to be decorated. I haven’t decided what pattern to use yet. I did make another round box with a poor attempt at the gorgeous effect Helen Breil creates with mica powders. This weird blotchy effect was not what I was going for! When done right, the clay sheet resembles rich and silky fabric. I’ll need to try that again. The box itself is quite nice though. 

Ikat box P1020580 Open Silkscreened Box Silkscreened box

Polymer clay zippered boxes

At the peak of my meh-ness, I decided that clearing up my extremely messy work area would inspire some creativity. That had me staring at a pile of scrap clay that either had to go into my already overflowing scrap box, or be worked into something interesting. I was bored to tears with Natasha beads and lentils, so pulled out some scrap clay tutorials and gave them a go. Here’re are my pieces using Randee Ketzel‘s scrap clay hearts and art deco swirls from 2 Good Claymates.

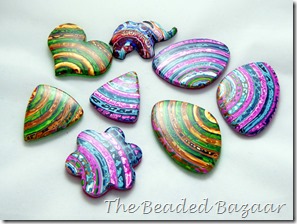
Art deco earrings Scrap clay pendants

Art deco earrings and scrap clay pendants

I decided this would be a good time to test what I learnt from Ginger’s sanding and buffing ebook. I didn’t pay enough attention before baking and had to be fairly aggressive with sanding, so some of the pattern on the scrap hearts were lost. But the pattern is still fun and the pieces feel wonderfully smooth. I had much better luck with the shadow cane domed piece. With the high amount of translucent clay, it picked up a beautiful shine! In the picture, the flat piece on the right has a layer of resin and the one on the left has been sanded and buffed. It might not be visible in the picture, but the shine on the two pieces is comparable! When I first looked at the buffed piece, I thought it was wet and tried to rub the water off it!
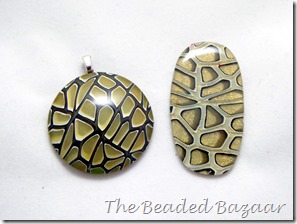
Shadow Cane Pieces

Shadow cane pendants